

How to Host a Site: A Beginner’s Guide
TL;DR: To host a site, choose a hosting plan, point your domain to the host, upload or install your website, enable HTTPS, and test it on 2 devices: desktop and mobile. For most beginners, managed shared hosting with a control panel is the simplest choice; sites with heavier traffic usually need a VPS or cloud plan.
Trying to host a site can feel oddly backwards: you may own a domain, yet nothing appears when someone types it into a browser. The domain is only the address; hosting is the service that stores your files and delivers them to visitors, and a poor choice can leave you chasing slow pages, confusing DNS settings, or surprise limits. Speed is not a decorative extra: Google considers LCP of 2,500 milliseconds or less, INP of 200 milliseconds or less, and CLS of 0.1 or less “good” at the 75th percentile. This guide shows you how to choose hosting, connect your domain, point DNS, install WordPress or upload files, enable HTTPS, test performance, and fix common launch problems, including when shared hosting no longer fits.
| Point | Details |
|---|---|
| Hosting stores files | Web hosting keeps your site’s files, databases, and media on a server that visitors can reach online 24/7. |
| Choose by workload | Shared hosting fits many starter sites, while a VPS or cloud plan gives you more control when traffic passes 10,000 visits per month. |
| Connect your domain | DNS records route your domain to the host, and changes often appear within 15 minutes but can take up to 48 hours because of caching. |
| Install and secure | A typical WordPress launch needs HTTPS, a supported PHP version, and a compatible database such as MySQL 8.0 or newer. |
| Test before launch | Check mobile usability, links, forms, backups, HTTPS, and page speed on at least 2 devices before sharing the site publicly. |
What does it mean to host a site?
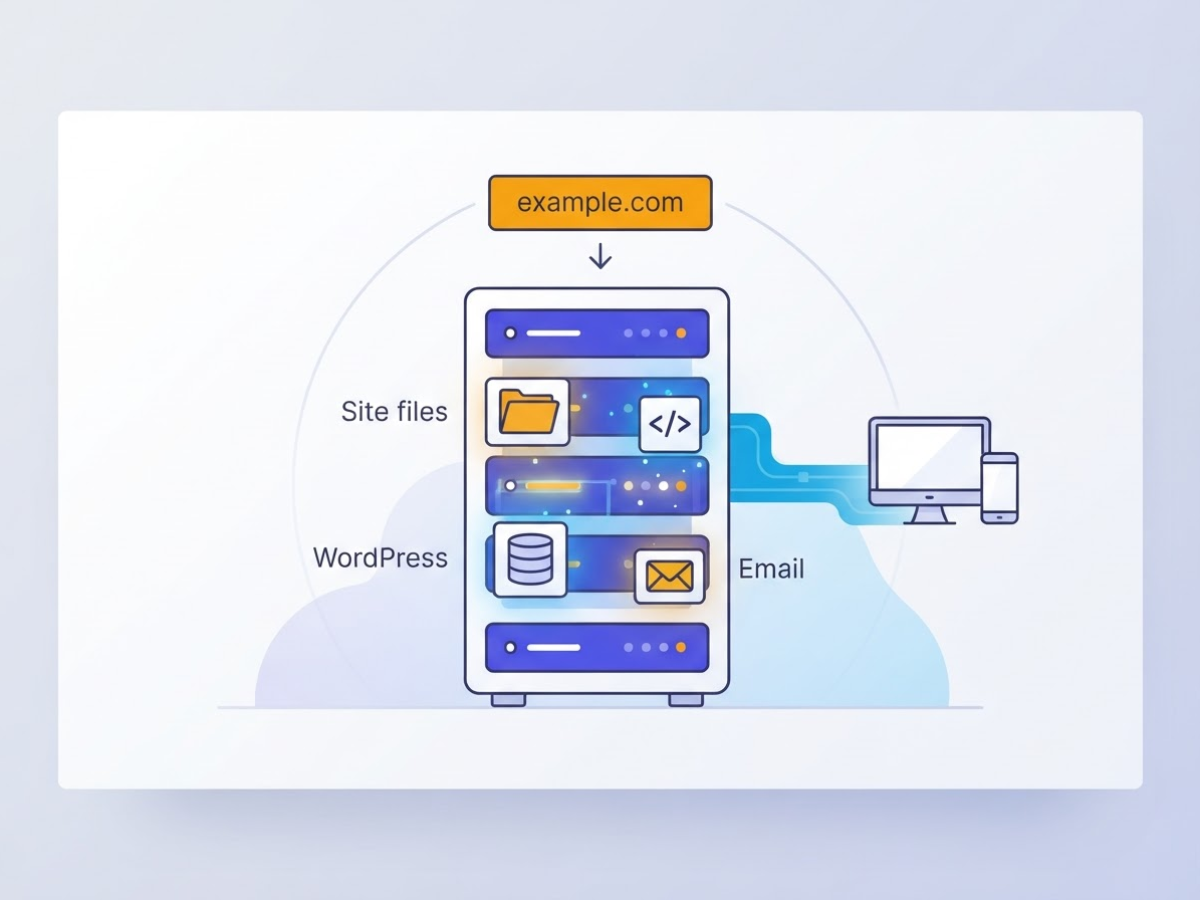
Hosting is the rented server space and supporting infrastructure that keeps your website available on the internet. Your host stores the site’s files, runs its applications, connects to databases, and may handle email, backups, security certificates, and server maintenance. Without hosting, a domain name has nowhere to send visitors.
The terms get mixed up because providers often sell them together. They are not the same thing:
| Part | What it does |
|---|---|
| Domain name | The readable address, such as example.com |
| DNS | Tells browsers which server belongs to that domain |
| Hosting account | Your rented space, server access, email tools, and control panel |
| Website software | The code or CMS that creates the site, such as WordPress |
Buying a domain does not publish a website. You must point its DNS records to your hosting server, then upload files or install software. If you want a more detailed setup path, follow this step-by-step guide to hosting a website.
A WordPress site needs more than a folder of files. It also needs a database for posts, settings, user accounts, and other site information. WordPress requires access to a MySQL or MariaDB database, so a plan that offers file storage but no compatible database will not run a normal WordPress installation.
You will usually see four hosting models:
- Shared hosting: Several websites share one server. It costs less, but another busy site can affect your resources.
- VPS hosting: You receive a more isolated portion of a server with assigned resources and more control.
- Dedicated hosting: One physical server serves your site alone. It offers control but costs more and may require technical administration.
- Cloud hosting: Your site uses connected server resources rather than relying on one physical machine. Pricing and configuration can be harder to predict.
Pro Tip: Before buying a plan, estimate storage, expected traffic, CMS requirements, email needs, and backup expectations rather than choosing only by disk-space headlines.
When someone visits, the browser looks up your domain through DNS, contacts the hosting server, receives files or generated data, and renders the page on screen. The next section covers the practical choices involved in setting up that chain.
Choose the right hosting before you launch
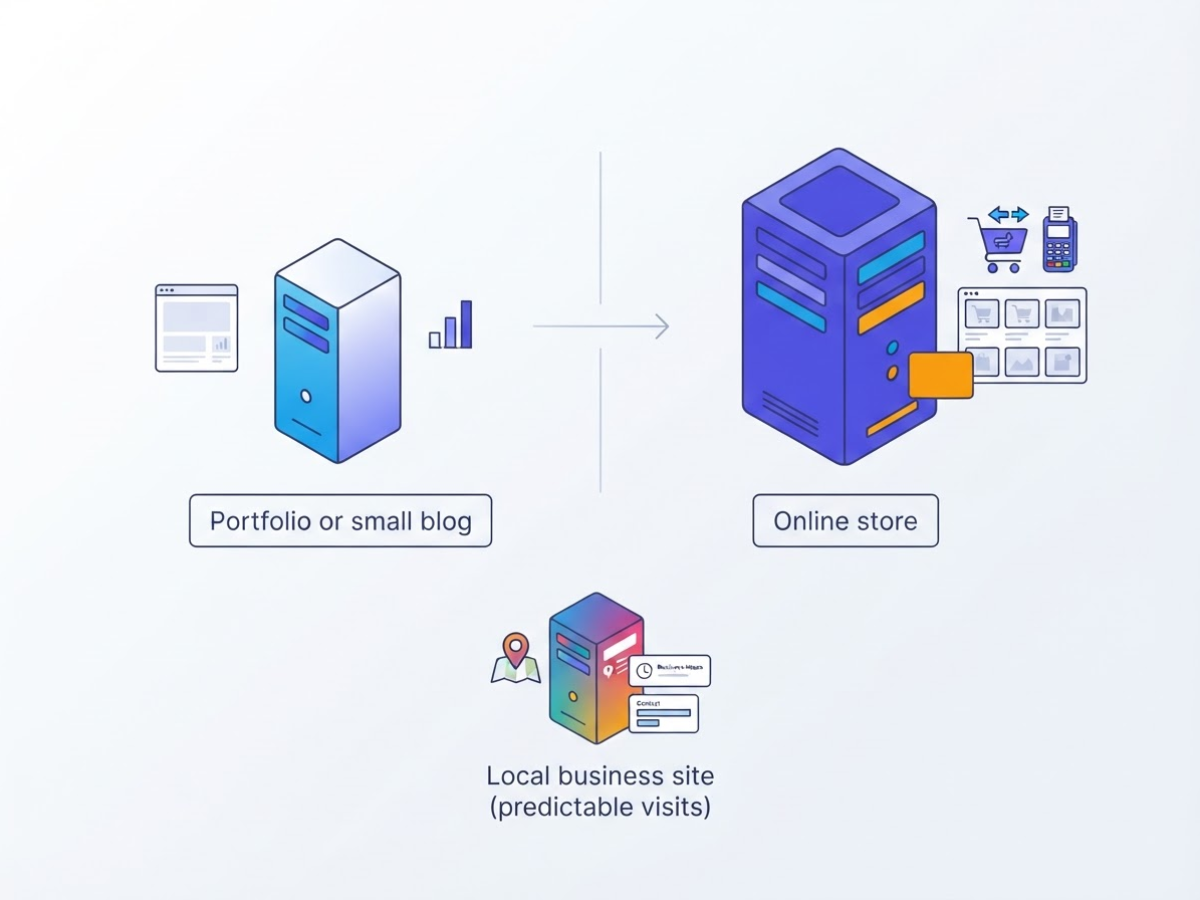
I start with the workload, not the discount banner. A five-page portfolio and a checkout-heavy store have very different demands, even when both use WordPress. For a practical overview of the full process, follow this step-by-step guide to how to host a website.
Use this decision path:
- Portfolio or small blog: Choose shared hosting. It usually costs the least, includes a control panel, and handles modest traffic without making you manage server updates.
- Local business site: Start with shared hosting if visits are predictable and the site mainly displays services, contact details, and a few images. Pick a plan with room for email, staging, and daily backups.
- Online store: Use better shared hosting for a small catalogue, but choose a VPS or managed cloud plan when product searches, payments, and traffic spikes compete for resources.
- High-traffic application: Choose cloud hosting or a dedicated server. Cloud hosting makes it easier to add resources across busy periods; dedicated hosting gives you the most predictable control but costs more and demands more technical work.
| Hosting type | Control and maintenance | Growth and typical cost |
|---|---|---|
| Shared | Least control; provider handles the server | Low cost, but neighbours share CPU and memory |
| VPS | Root or elevated control; you handle more updates | Mid-range cost and steadier resources |
| Cloud | Flexible resources; setup can be more involved | Higher cost, with easier capacity changes |
| Dedicated | Full server control; you manage or pay for management | Highest cost, suited to demanding workloads |
An inexpensive shared plan is not automatically a bad choice. If your blog receives 2,000 visits a month, uses compressed images, and runs only a few plugins, paying for a dedicated server would solve a problem you do not have. The irritation comes later when a host advertises “unlimited” usage but quietly limits CPU time, memory, processes, or database connections.
Pro Tip: Prioritize a clear upgrade path and reliable backups over unlimited-resource wording that does not explain actual CPU, memory, or process limits.
Before buying, check for free SSL, automated backups, uptime support, a usable control panel, migration help, stated resource limits, and a data centre near your main visitors. For WordPress, confirm support for PHP 8.3 or higher, MariaDB 10.11 or higher or MySQL 8.0 or higher, and HTTPS.
Run this final check: find the renewal price, confirm the next upgrade tier, ask whether support is available 24/7 by chat or ticket, and check whether a real technician handles migrations. Once the plan fits your workload, you can move on to preparing the domain and hosting account.
How to host a site in seven practical steps
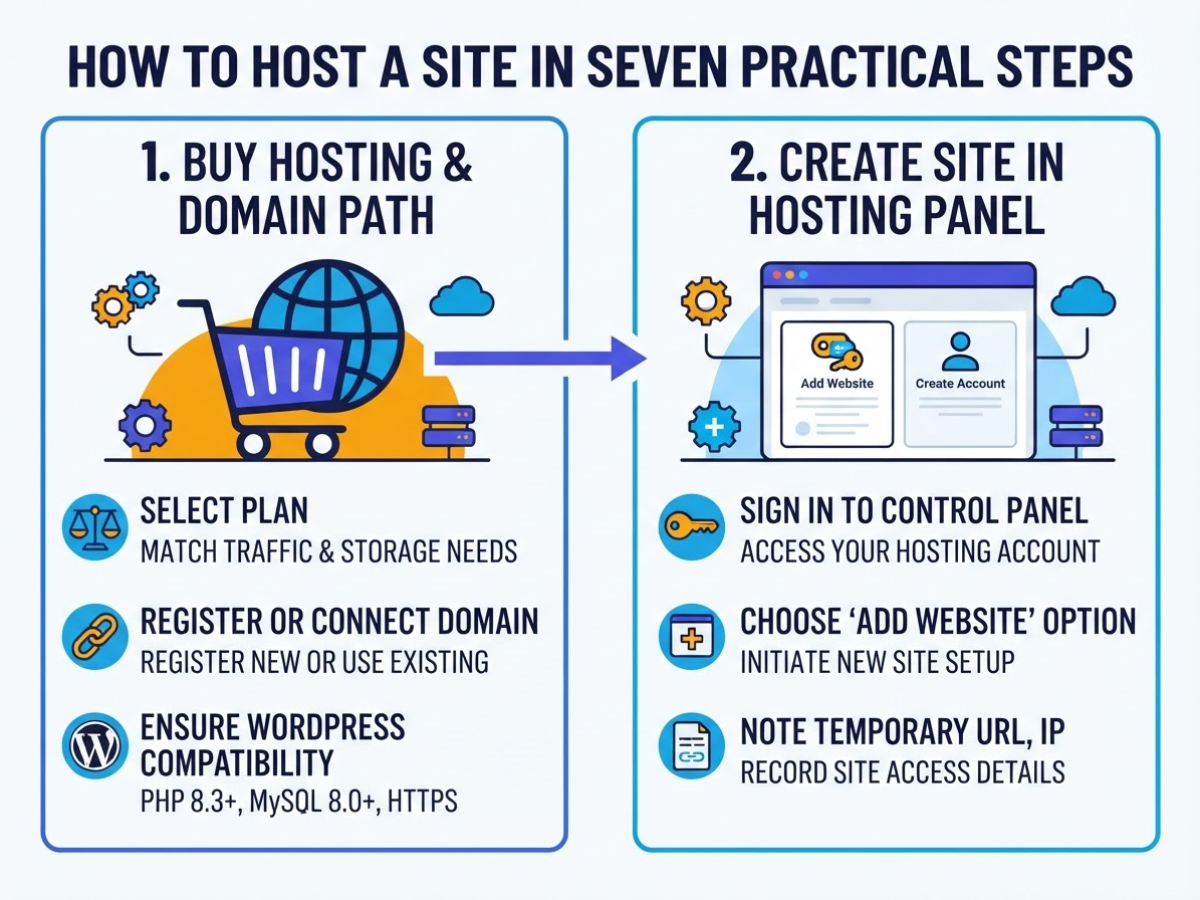
A working launch usually comes down to seven handoffs. I have seen more sites delayed by a forgotten DNS record or an untested contact form than by the hosting plan itself, so use these checkpoints in order.
- Buy hosting and choose the domain path. Pick a plan that matches your site’s traffic, storage, email, and software needs. Register a new domain during checkout, or select the option to connect a domain you already own. If you plan to run WordPress, choose a host that supports PHP 8.3+, MySQL 8.0 or MariaDB 10.11+, and HTTPS. Do not pay for high-tier resources before your site needs them.
- Create the site in the hosting panel. Sign in to the control panel, choose “Add website” or a similar option, and create the hosting account. Note the temporary URL, server IP address, nameservers, FTP details, and database credentials. Hosting dashboards use different labels, which is annoying but normal.
- Connect the domain. At your registrar, replace the domain’s nameservers with the host’s nameservers, or edit the A and CNAME records as your host instructs. DNS changes can appear inconsistent for a while because old records remain in local and provider caches. Cloudflare says its default proxied DNS TTL is 300 seconds, but previous TTL values can keep old data visible longer, so do not judge the setup from one browser or Wi-Fi connection.
- Install the site software or upload files. For WordPress, run the host’s one-click installer and set the administrator username, password, site title, and language. For a custom site, upload your HTML, CSS, JavaScript, images, and other media through the file manager or FTP. Put the files in the document root, often named
public_htmlorwww, or visitors may see a blank directory instead of your homepage. - Set up the database. WordPress needs a MySQL or MariaDB database to store pages, users, settings, and other site data. One-click installers create this automatically, while manual installations require you to create the database, user, password, and host name, then enter those values in the application configuration. A single typo here often produces a vague “database connection” error.
- Turn on HTTPS and select one primary version. Activate the host’s SSL certificate, then decide whether the canonical address uses
https://www.example.comorhttps://example.com. Test both HTTP and HTTPS, with and withoutwww, and confirm each redirects to the chosen version. Google recommends HTTPS, and Chrome may label HTTP pages as not secure.
Pro Tip: Keep the temporary hosting URL or staging copy available until the real domain, HTTPS certificate, redirects, forms, and canonical URLs all pass testing.
- Test before announcing the launch. Open key pages on a phone and desktop. Submit every form, check menus, load images, test buttons, review error pages, and confirm analytics records a visit. Also inspect the source or SEO plugin for the correct canonical URL. PageSpeed Insights can reveal slow images, but do not mistake a lab score for a complete launch check.
With the site live and the technical checks complete, the next decision is how to keep hosting costs and maintenance under control.
Launch checks that prevent common hosting problems
A launch can fail even when the files are uploaded correctly. I have seen beginners spend hours changing WordPress settings when the real issue was an expired domain or a nameserver still pointing to the previous host. Use this checklist before you announce the site:
- DNS: Confirm the domain is active, the nameservers match your hosting account, and the required A, AAAA, CNAME, and MX records exist. DNS changes may appear quickly, but cached data can keep showing the old site for several hours. Do not keep editing records while you are still waiting.
- HTTPS: Test both
http://andhttps://. Mixed-content warnings usually come from images, scripts, or stylesheets still using HTTP. Check that the certificate covers both the root domain andwww, then remove redirects that send visitors back and forth in a loop. Google recommends HTTPS, and Chrome may label an HTTP page “not secure.” - Security: Replace weak hosting, database, and WordPress passwords. Update the CMS, themes, and plugins, schedule automatic backups, and remove unused administrator accounts. A public login page is not automatically dangerous, but exposing an admin username and using a reused password is an avoidable mistake.
- Server setup: Check the document root, file permissions, database name, username, password, and host value. A blank page or 500 error can mean the PHP version does not suit your application. For WordPress, verify that the host supports PHP 8.3 or greater and a current MySQL or MariaDB version.
- Visitor experience: Submit every contact form, test transactional email, load the favicon, open
robots.txtand the XML sitemap, confirm analytics records a visit, and view a real 404 and 500 page. Also test the mobile version, since Google uses mobile content for indexing and ranking.
Follow a full step-by-step hosting checklist if you are unsure which setting you changed. If the site works on one device but not another, suspect DNS cache or the website first. If several unrelated sites on the same server fail, send support the domain, exact error, timestamp, screenshot, affected URL, recent changes, and any error-log entry. That evidence gets you past vague replies and points to the right next troubleshooting step.
Improve speed and scale after your site is live
The first week after launch is when your hosting setup tells you the truth. Check the site while traffic is normal, then watch what happens when several people browse, submit forms, or place orders at once. A good-looking demo proves very little.
- Measure the right layer on day one. Hosting response time is the time your server takes to start answering a request, often visible as time to first byte. Front-end performance covers what the browser must download and render, such as images, CSS, JavaScript, and fonts. Application and database performance sits behind dynamic pages: slow queries, overloaded PHP workers, or a badly behaved plugin can delay a page even when the server responds quickly.
Use PageSpeed Insights, uptime monitoring, server logs, and comments from real users together. PageSpeed lab results are useful for reproducing a problem, but a lab score is not a substitute for field data from people on slower phones and networks. A score of 90 or higher is good for the lab test, not proof that every visitor gets a fast experience.
- Set targets by the end of week one. Aim for a Largest Contentful Paint (LCP) of 2.5 seconds or less, Interaction to Next Paint (INP) of 200 milliseconds or less, and Cumulative Layout Shift (CLS) of 0.1 or less at the 75th percentile. These are practical Core Web Vitals targets, not numbers to chase on one laptop.
- Fix waste before buying a bigger plan. Compress oversized images, enable full-page and browser caching, use a lightweight theme, remove plugins you no longer need, and clean old database revisions, sessions, and transients. Add a CDN when visitors are spread across regions. I would check these items before paying for more CPU, because a bloated plugin or 4 MB hero image will follow you to a more expensive server.
- Review weekly for the first month, then monthly. Look for repeated resource throttling, slow dynamic pages, failed background queues, memory exhaustion, or sharp response-time increases during traffic spikes. If logs show PHP workers waiting on the database, upgrading storage alone will not solve it. Test backups and watch uptime too; an attractive speed score cannot explain why the site disappeared at 2 a.m.
- Upgrade or move when the evidence repeats. Choose a plan with more memory, CPU, worker capacity, or a managed database when the same limit appears after sensible cleanup. Use the hosting selection checklist to compare those limits rather than choosing from storage space alone. Once performance data points to a hosting ceiling, the next section covers the maintenance work that keeps your site reliable.
My honest take on hosting a site
I have helped new site owners choose hosting, and the same mistake appears repeatedly: they compare server technology before they have a stable website. For a small brochure site or a new blog, basic shared hosting is often the sensible starting point. You may not need a virtual server, a premium CPU, or a long list of technical specifications. You need the site to load reliably, your contact form to work, and someone to answer when something breaks.
I pay closer attention to backups, support quality, HTTPS, upgrade options, and clearly stated limits. Marketing language is easy to print on a pricing page; a usable backup from three days ago is what matters after a bad plugin update. Shared hosting has real annoyances, including noisy neighbours, restricted settings, and resource caps, but paying for unused capacity creates its own waste. The cheapest plan is not automatically sensible, either, if support is slow or backups are unclear.
I reassess a hosting plan when monitoring shows recurring resource limits, consistently poor response times, or operational needs the current plan cannot support. That might mean scheduled jobs, heavier traffic, staging access, or separate email requirements. Upgrade because your evidence says the site has outgrown the plan, not because a specification sheet made the larger package look impressive.
— AVM Cloud Content Strategy Team
Ready to host your site with AVM Cloud?
If you want to host a site without stitching together separate providers, AVM Cloud’s DomainAdda gives you a practical place to compare domain registration and hosting in one workflow. Do not choose on price alone. Check the plan’s fit for your site type, control-panel access, SSL, support, backups, and upgrade options. A small portfolio site and a busy store have different needs.
You can compare affordable hosting options in India, then connect an existing domain or register a new one. Install your chosen platform, test the site on mobile, confirm forms and email, and work through your launch checklist before going live. The setup can get irritating when DNS records or migration details do not behave as expected. If that happens, support can help you untangle the next step without forcing you into a plan you do not need.
Frequently Asked Questions
Can I host a website without buying a domain name?
Yes. Most hosting accounts include a temporary URL or subdomain, so you can build and test your site before purchasing a custom domain. Use that address for a few days during setup, but connect your own domain before sharing the site publicly because a provider subdomain looks unfinished.
How much does it cost to host a website for one year?
For a basic website in India, first-year hosting often falls around ₹1,000 to ₹5,000, depending on the plan, domain, email, and add-ons. Check the complete 12-month cost and the renewal price, since a low introductory rate can make the second year unexpectedly expensive.
Can I host a website from my own computer?
Technically, yes, but your computer must stay powered on 24 hours a day and remain reachable through a stable public internet connection. You also need to handle security updates, backups, router settings, and outages, so personal hosting is usually more trouble than it is worth for a public site.
How long does it take for a new website to go live?
A simple site can go live in 15 minutes once your hosting account and DNS records are ready. In practice, allow several hours for DNS caching, SSL activation, mobile checks, contact forms, redirects, and email testing, since one missed setting can make a finished site appear broken.
What is the difference between web hosting and cloud hosting?
Web hosting is the broad service that stores and delivers your website files, while cloud hosting usually runs resources across connected servers rather than one fixed machine. That arrangement can handle changing traffic more flexibly, but you may also face more complicated pricing and limits, so compare the plan details instead of trusting the label alone.
Recommended reads
- How To Host A Website Step By Step Guide
- What To Look For In A Web Host Check These 7 Tips
- Web Hosting Vs Domain Name The Difference
- Shared Vs Vps Hosting Know Which Is The Best Option
Sources
- Requirements – WordPress.org
- FAQ Installation – Documentation – WordPress.org
- How the Core Web Vitals metrics thresholds were defined | Articles | web.dev
- About PageSpeed Insights | Google for Developers
- Time to Live (TTL) · Cloudflare DNS docs
- FAQ · Cloudflare DNS docs
- Mobile-first Indexing Best Practices | Google Search Central | Documentation | Google for Developers
- Technical SEO Techniques and Strategies | Google Search Central | Google for Developers